I began my photography journey 4 years ago and I can’t say this enough: “It’s all about the light.” In this post I want to show you what I learned about shooting in EXTREMELY LOW-LIGHT conditions in a place that hasn’t seen sunlight in 750,000 years. Here are some techniques to capture the best photo you can in dark scenarios…
_
This is the final installment in my series into the depths of Rat’s Nest Cave in Canmore, AB, Canada. You can read about my initial descent into the cave and the experiences here: Into Earth’s Womb, Adam Walker: A Man Underground, Exploring the Unnatural with Christian Stenner, The Rat’s Nest Cave Will Change You, I Promise.
_
Since photography is all about lighting, when it comes to taking photos in low-light conditions it opens up a entirely new level of technical challenges. After descending into the Rat’s Nest Cave a couple times in 2017 I’ve learned (the hard way) what to expect and how to shoot awesome photographs in extremely dark places. I’ve put together a few technical tips to help you know your way around shooting in the dark, on both your DSLR Camera and your Smartphone:
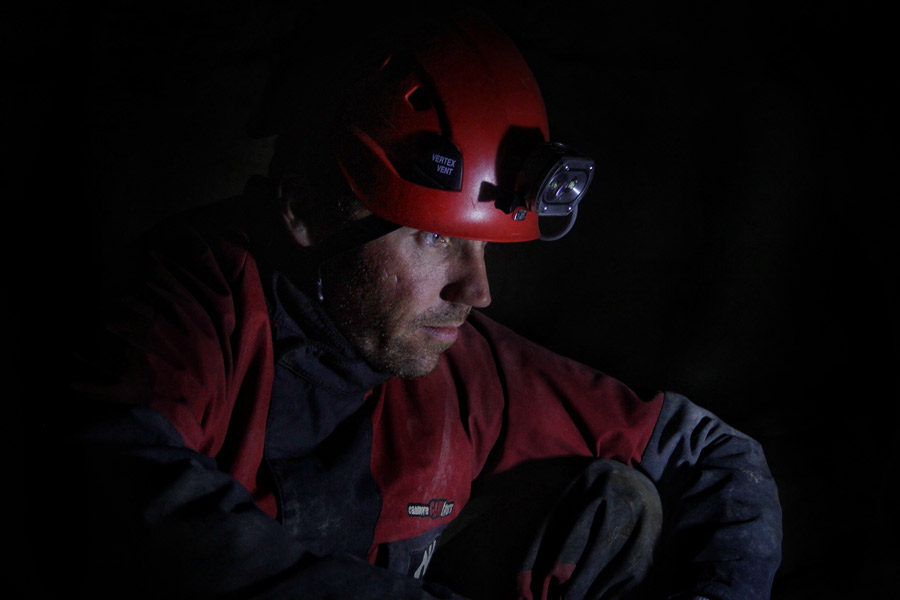
1. Identify the light you can see.
First things first – our eyes need time to adjust to light. Give your eyes a few moments to adjust themselves to the type of light you’ll be working with. Once adjusted, look around and identify the light you do have. Sometimes it will be just moonlight, other times like in the Rat’s Nest Cave, you have ZERO natural light. As in, if you turn off all the headlamps and move your hands in front of your face, you will NOT see your hands whatsoever. Headlamps and small lights you have with you will be the main source of light.
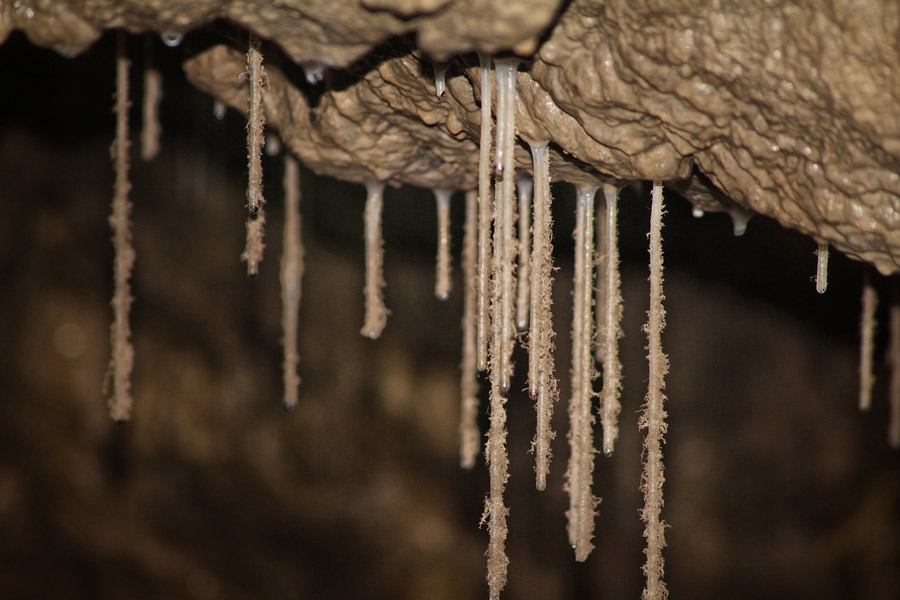
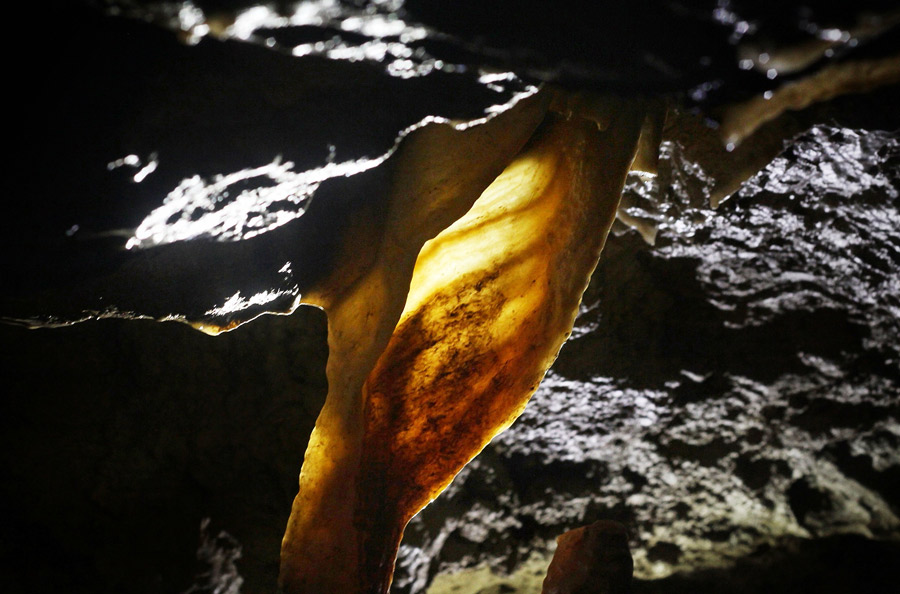
2. Use light to make shapes appear stronger.
Once you’ve scanned and identified the light you can work with, it’s all about shapes. I think shapes are much more evident in a photo when they are contrasted by a strong burst of light. By moving light sources, you also change every shape the eye sees in the photo. I’ve found great results in brightening the light areas of a photo and darkening the dark’s. It helps bring people into the specifics of a scene.
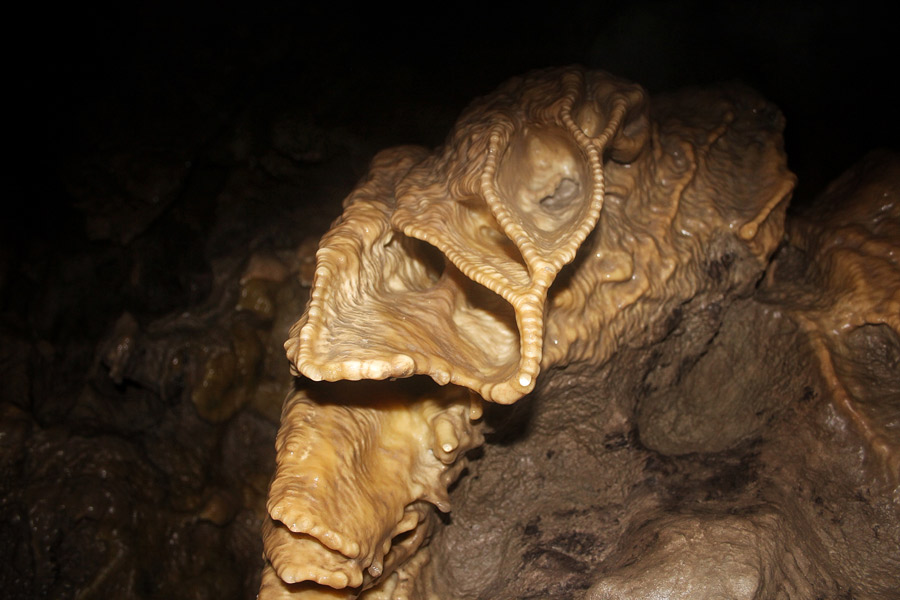
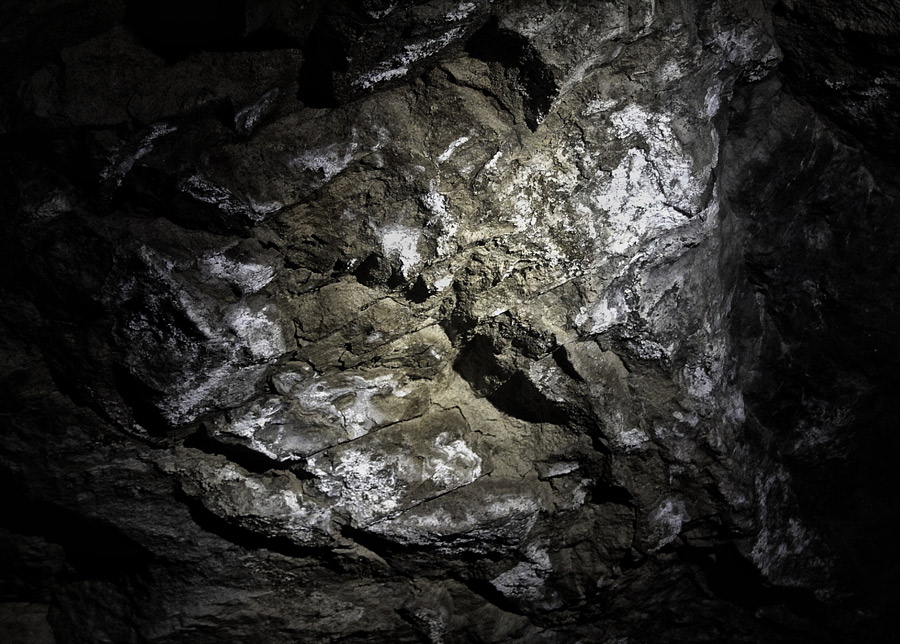
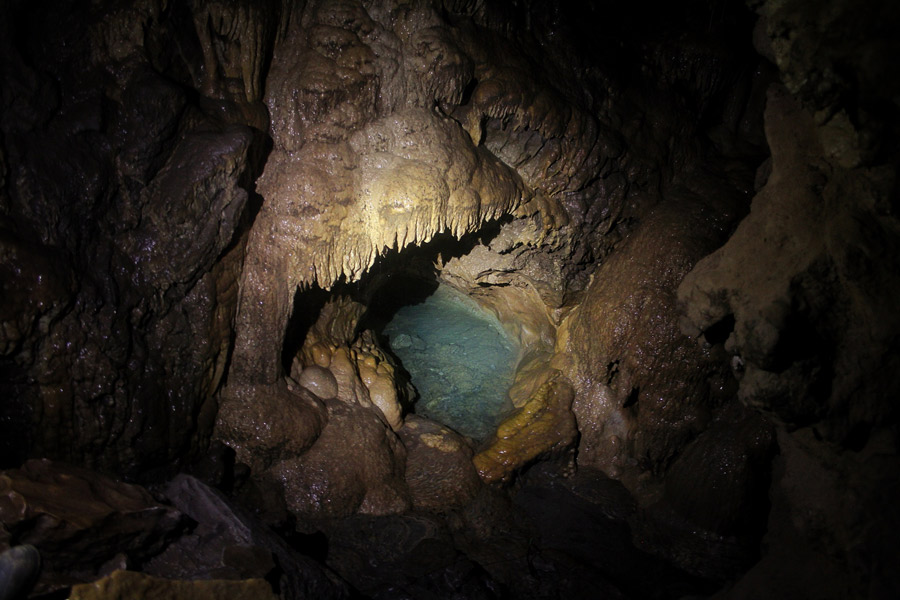
3. Depth and layers are your advantage.
When you rappel into the lower areas of the Rat’s Nest Cave you’ll find layer upon layer of sediment that is hundreds-of-thousands of years old. Shadows of dust and moist drippings from the cave are awe-intriguing photos alone but by adjusting the ambiance of a photo, you can “place” someone there, as if they can reach out and touch what’s in the photo.
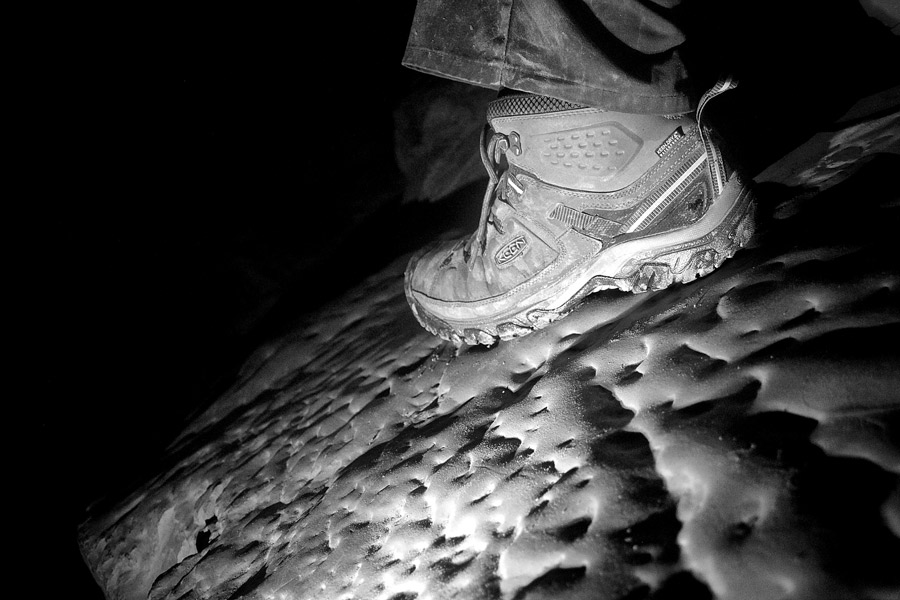
4. Think abstract.
When we reduce the elements in an image to simple forms, we sometimes start noticing art. Look for light streaks, patterns in shapes, where do all the lines intersect? When processing, I’ve often added a Vignette to my photos, making the edges/outsides of the photo darker, thus keeping the viewer’s attention in the middle of the image.
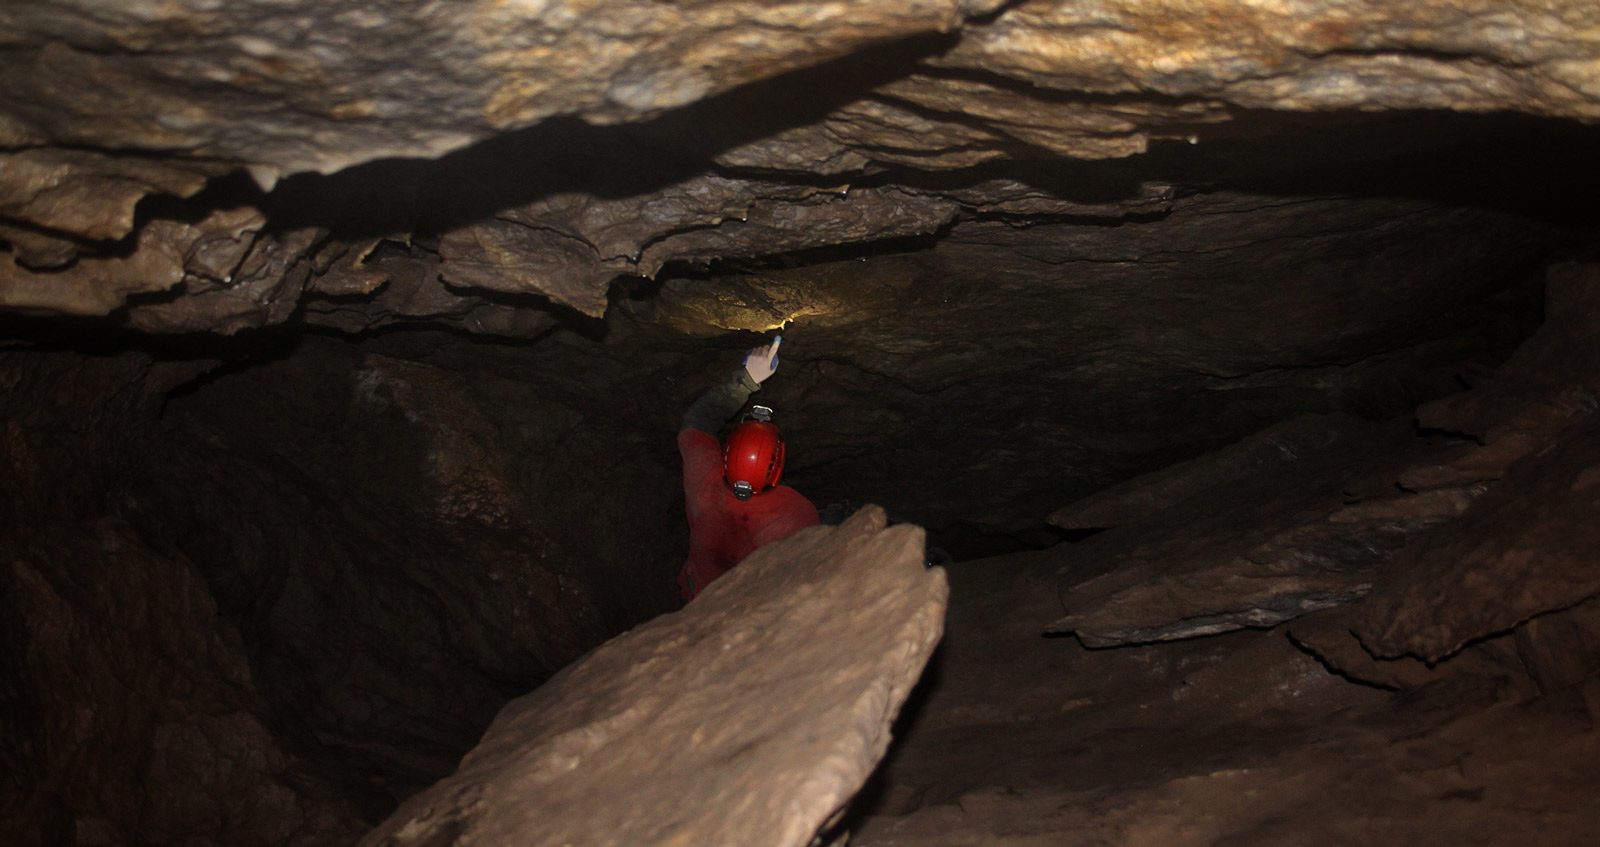
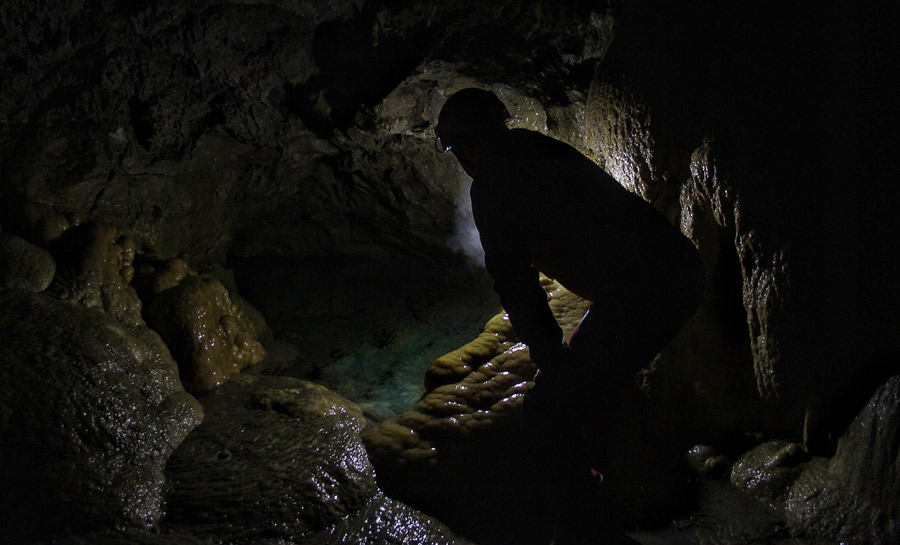
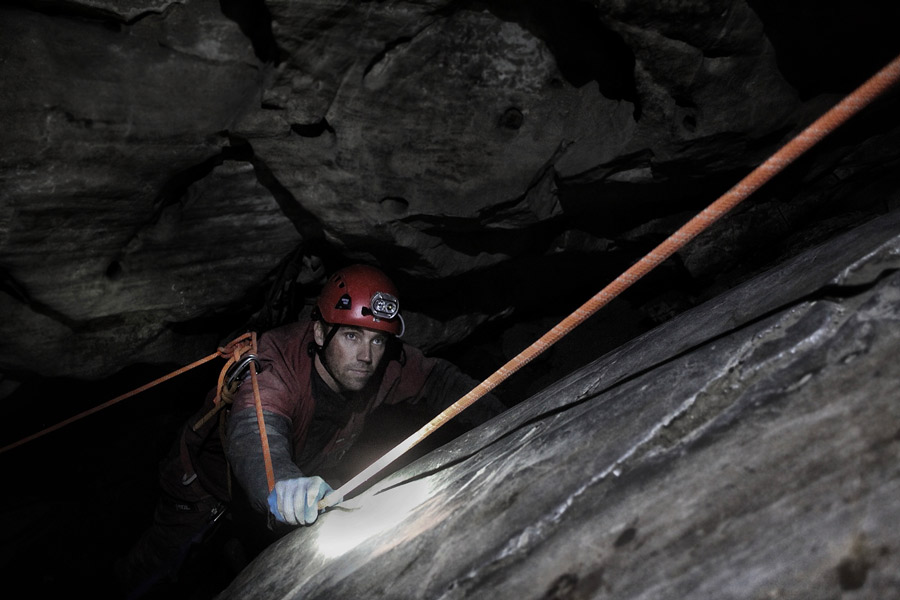
5. Try saturating (or de-saturating) the color you CAN see.
Since the dominant color in low-light scenarios is black, color can be an effective tool to catch the eye. Try different photographic treatments to your photos. Meaning, try processing or editing photos in just black-and-white, or try de-saturating colors and enhancing others to lead the eye. In the photo below, I’ve de-saturated the entire image expect what I WANT you to see (the caver and his tools). Your eye sees the caver (Adam Walker) and your sight is led up the rope (where the caver is looking).
6. Shoot using manual settings and use a tripod to stabilize your images.
While the options to use Auto or Flash are always available, I suggest taking things a step further and shooting on ‘Manual’ Mode. Taking photos in low light means choosing between noise from a high ISO setting, or the blur from a slower shutter speed. The idea is to make adjustments so you can let more light into the camera, while reducing blur and noise. Shoot at high shutter speeds to avoid blurry images, and decrease your aperture to the lowest number (your f/stop). For example, some of my cave images were at Aperture F1.7 | ISO 3200 | Exposure 1/2s. For longer exposure shots, you can experiment with anywhere from 5 seconds to even 30 seconds (30 seconds is where I have shot photos of the Northern Lights). You’ll also want to bring a tripod if you plan on shooting photos that are completely free of blur. Using a tripod and timer for your images also helps to prevent any camera shake while taking the photo.
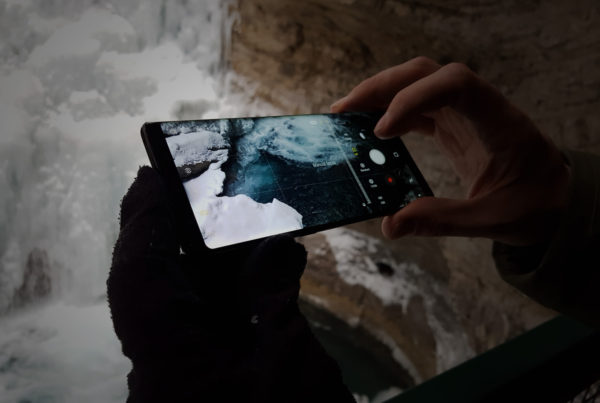
ON A SMARTPHONE: Use Pro / Manual Camera Mode.
Let’s face it – a great challenge for smartphone camera manufacturers is capturing the best photo in low-light conditions. Sometimes (most of the time) you may notice your photo looks “grainy” when you zoom in, or an image will be blurry. This is a personal nightmare of mine and I have just about figured out every trick in the book to reduce and eliminate noise! However, there’s a game-changer, and it’s called “Pro” or “Manual” Mode. This camera mode on your smartphone allows you to capture better photos in low light by changing the aperture of the lens. (You can set your camera to let more light into the lens for a longer period of time, thus capturing your scene in focus). The smartphone I shoot with is a Samsung Galaxy Note8, which (for the first time in history) allows for a 10-second Exposure, and this is by far the most advantageous feature to shooting in dark conditions.
ON A SMARTPHONE: Keep your hand steady! Or better yet – use a Mobile Tripod.
Much like shoooting on a DSLR camera, you’ll want to setup your mobile device on a tripod to help stabilize the photo to eliminate camera shake. The less light, the more crucial this is. If you go down into the Rat’s Nest Cave without a way to stabilize your photos, you may end up with a few blurry photos and you’ll wish you carried a small handheld tripod in your pack.
_
I photographed the Rat’s Nest Cave while on Canmore Cave Tour’s new Private Caving Experience – SOLITUDE. Without being with a group of people, you’ll have time to enjoy every inch of the cave while exploring at your own pace.
What: A Signature Canadian Experience as designated by Destination Canada.
Where: Rat’s Nest Cave, designated a Provincial Historic Site in 1987, situated on the south-facing slope of Grotto Mountain near Canmore, AB, Canada. Access to the cave is restricted in order to protect the environment inside and entry is facilitated by Canmore Cave Tours.
How: Connect with the Team at Canmore Cave Tours:
Facebook: www.facebook.com/canmorecavetours
Twitter: www.twitter.com/canmorecavetour
Instagram: www.instagram.com/canmorecavetours
Web: canmorecavetours.com
Toll Free: 1877.317.1178
_
Dax
As always, drop me a line and follow my adventures on:
Instagram
Twitter
Facebook Page